Settings Reference
Open Settings
- Open Settings from the app sidebar.
- Select the section for the setting you need.
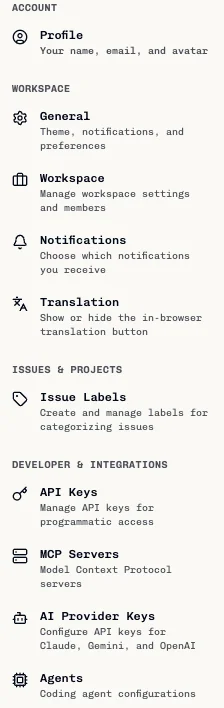
| Section | Use |
|---|---|
| Profile | Name, email, and avatar. |
| General | Theme, notifications, and preferences. |
| Workspace | Workspace name, color, and icon. |
| Notifications | Choose which notifications you receive. |
| Translation | Show or hide the in-browser translation control. |
| Issue Labels | Create and manage issue labels. |
| API Keys | Create and revoke your programmatic keys. |
| MCP Servers | Review MCP access and server capabilities. |
| AI Provider Keys | Configure provider keys used by supported AI features. |
| Agents | Configure coding-agent settings. |
Workspace People & Access is in Admin → People & Access, and role definitions are in Admin → Permissions. The current Workspace settings form covers appearance; it is not the member-management screen.
API Keys
- Open Settings → API Keys.
- Select Create API Key, enter a name, and choose whether to make it read-only. A read-only key can read data through MCP but cannot create or update it there.
- Create the key, copy it from the reveal panel, and store it in a secret manager before closing the panel.
- Delete a key from the same page to revoke it.
Treat a key like a password. It represents its owner on supported agent routes. It does not grant access to browser-session-only routes such as key management, admin, billing, invitations, membership/role changes, sharing, or destructive deletes.
Some agent-facing REST routes accept vk_ keys. The API applies a deny-list, so this does not make every /api route available. The Read-only key option is described by the UI as restricting MCP create/update operations; do not assume it constrains REST requests.
On the same page, MCP access controls whether API keys can connect through MCP. The optional allowed-client list uses exact client names; an empty list allows any client. Changes can take up to five minutes to apply. Turning MCP off does not change REST access.
MCP Servers
- Open Settings → MCP Servers.
- Review the server URL and capabilities shown by the app.
- Register the MCP server in your client using Streamable HTTP and a bearer key.
- Store the key in the client’s secret facility, not in shared project files.
- Confirm the connection with a read operation and inspect the result.
See MCP Usage for a client setup example. For allowed REST operations and session-only exclusions, see Setup and Access.
Workspace access and roles
Use Admin → People & Access to invite and review workspace members. Use Admin → Permissions for the workspace and team permission tables. See Members and Roles before changing access.
The API/MCP role tokens and the labels offered by each UI are not interchangeable. The role guide lists each surface separately.