Set Up Microsoft Entra ID
This page connects Microsoft Entra ID to iKanban, by OIDC or by SAML. Both were tested on the free Entra tier. You need a Global Administrator or Application Administrator in your Entra tenant. A workspace has one connection at a time, so choose one.
Before you start: verify your domain in Entra
Go to Entra ID → Domain names and select Add custom domain. Add the TXT record Entra shows at your DNS host, then select Verify. OIDC needs this step: without it, Entra sends xms_edov as false and iKanban refuses the user. SAML needs it only to give users an address on that domain. For both options, iKanban signs in only people whose email domain you proved in iKanban.
Option A: OIDC
1. Register the app
Go to Entra ID → App registrations → New registration:
| Field | Value |
|---|---|
| Name | a name your staff will recognise, such as "iKanban" |
| Supported account types | Single tenant only. Never multi-tenant |
| Redirect URI | platform Web, value https://auth.i-kanban.com/oauth2/idpresponse |
From the app's Overview, keep the Application (client) ID and the Directory (tenant) ID.
2. Add the optional claims
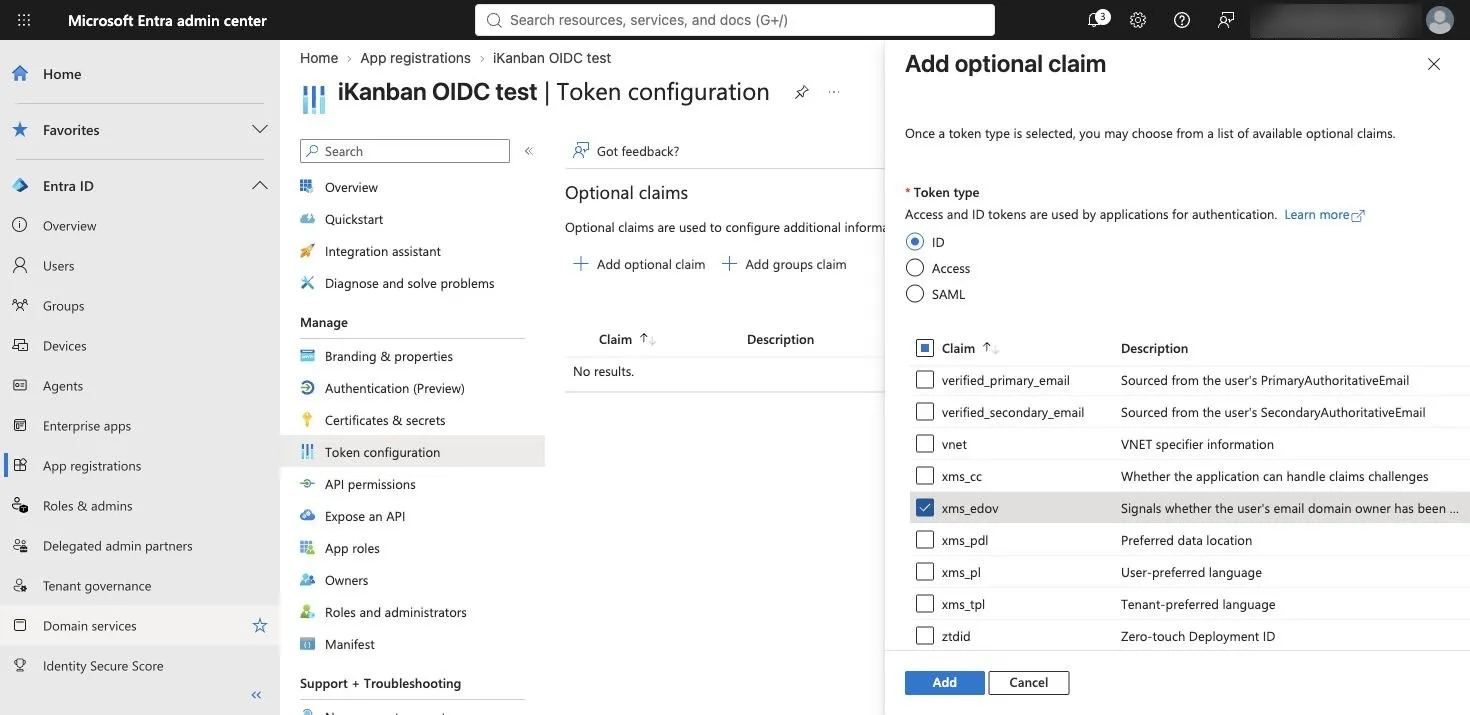
Go to Token configuration → Add optional claim → ID, tick email and xms_edov, then select Add. When Entra asks to turn on the Microsoft Graph email permission, tick it and select Add.
Entra does not send email_verified for work accounts, so iKanban reads xms_edov instead.
3. Create a client secret
Go to Certificates & secrets → Client secrets → New client secret, then select Add. Copy the Value, not the Secret ID. Entra shows it once. Set a reminder before it expires: an expired secret stops every company sign-in.
4. Connect in iKanban
Use these values on the OIDC tab of the Connection card:
| Field | Value |
|---|---|
| Issuer | https://login.microsoftonline.com/<Directory (tenant) ID>/v2.0. Use the tenant GUID, with its dashes and no trailing slash. Not a domain name, common, organizations or consumers: with those, iKanban refuses every user |
| Client id | the Application (client) ID |
| Client secret | the secret Value |
Option B: SAML
1. Create the enterprise app
Go to Entra ID → Enterprise apps → New application → Create your own application. Give it a name, keep Integrate any other application you don't find in the gallery (Non-gallery), then select Create.
2. Fill in the Basic SAML Configuration
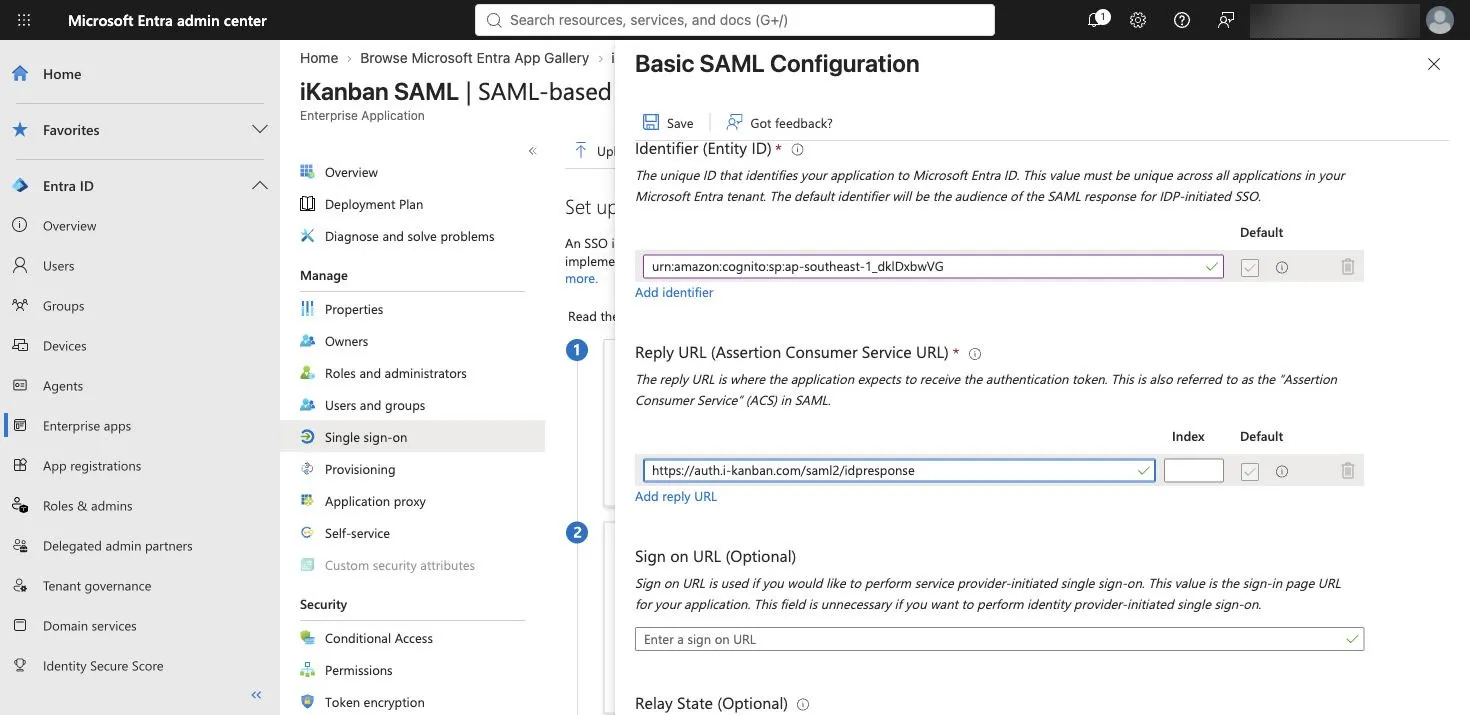
Select Single sign-on → SAML. In Basic SAML Configuration, select Edit, then fill in these values and select Save:
| Field | Value |
|---|---|
| Identifier (Entity ID) | urn:amazon:cognito:sp:ap-southeast-1_dklDxbwVG |
| Reply URL (Assertion Consumer Service URL) | https://auth.i-kanban.com/saml2/idpresponse |
3. Add the email_verified claim
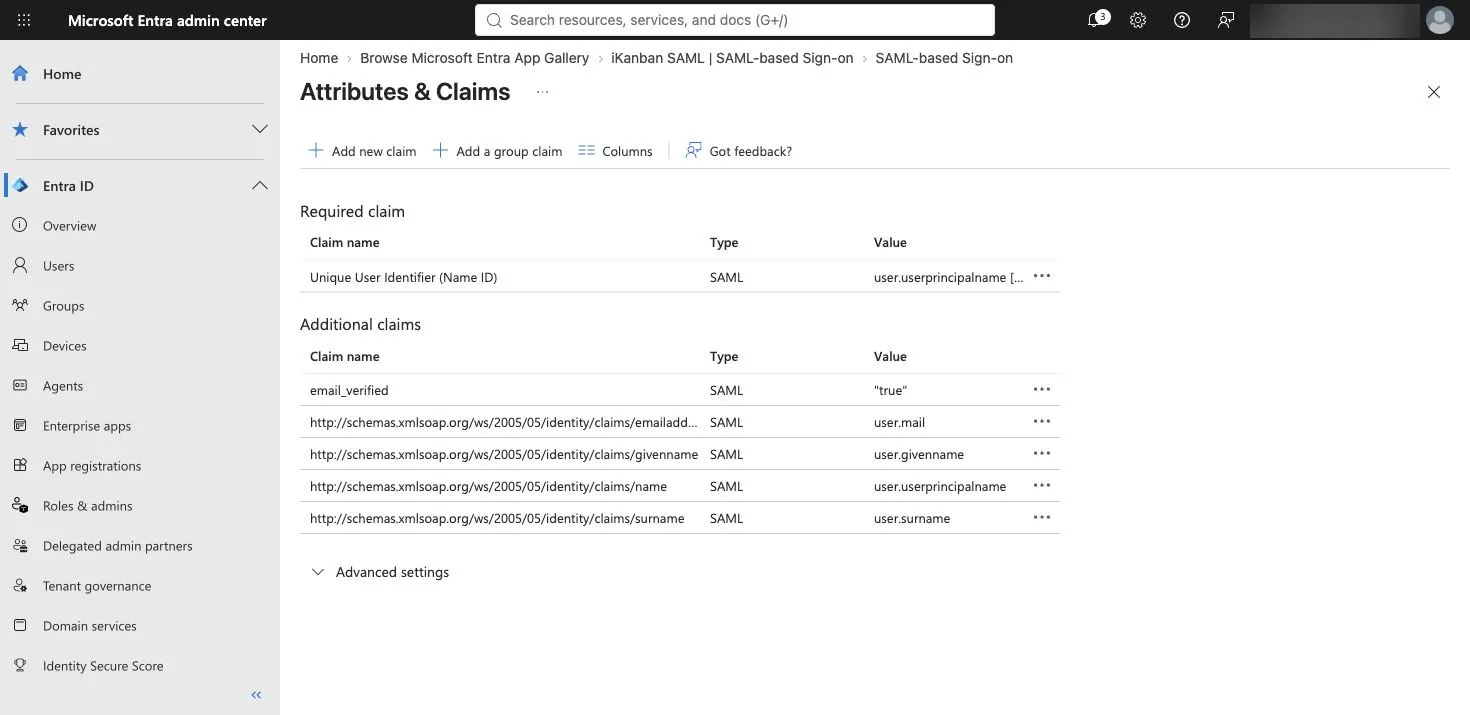
In Attributes & Claims, select Edit → Add new claim:
| Field | Value |
|---|---|
| Name | email_verified |
| Namespace | leave empty |
| Source | Attribute |
| Source attribute | type true, then pick "true" from the list |
Select Save. Keep the other claims. Entra does not send email_verified in a SAML token, and iKanban requires it.
4. Copy the metadata URL
On the Single sign-on page, under SAML Certificates, copy App Federation Metadata Url.
5. Assign people
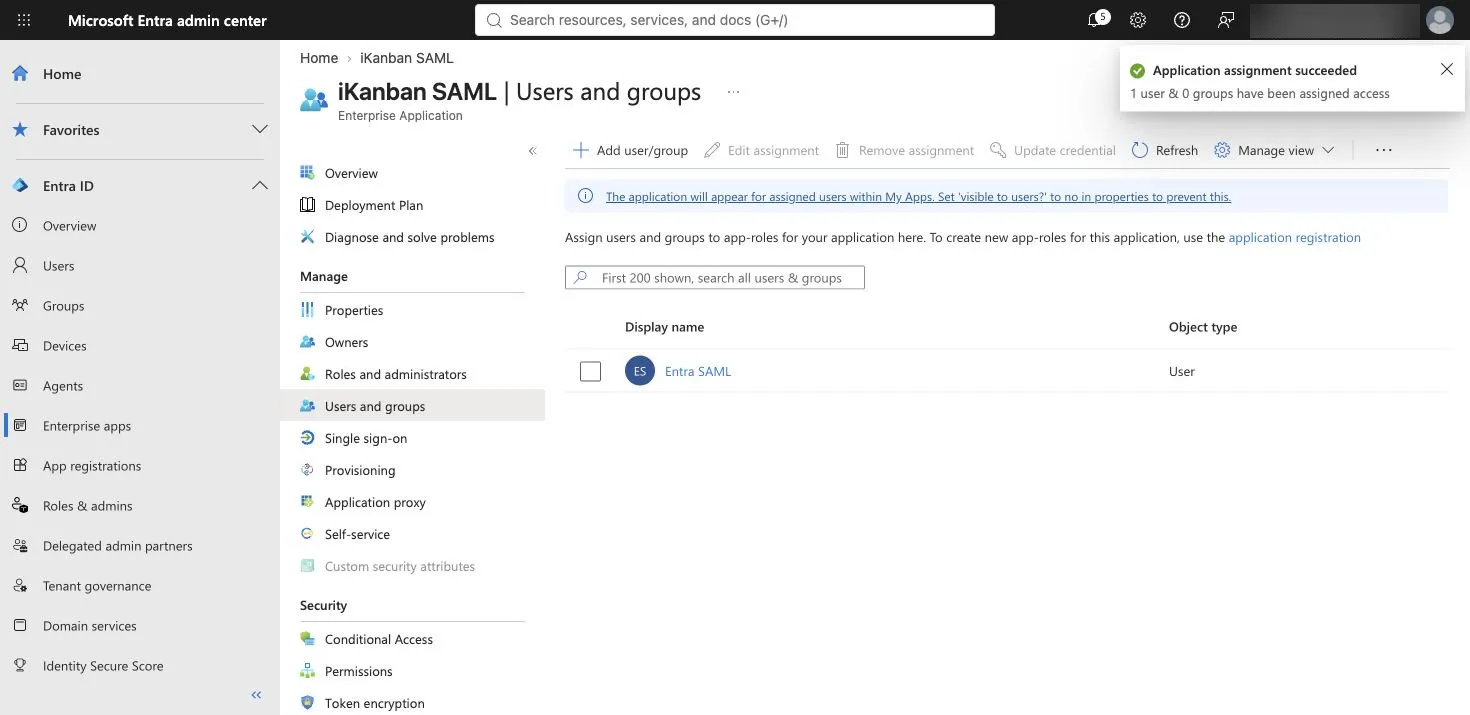
Open Users and groups → Add user/group and assign a test user first. The free Entra tier assigns individual users only. Assign the rest of your staff after the test sign-in works.
Every user needs an Email
For OIDC and SAML, each person needs the Email field set on their Entra user, under Properties. Without it, Entra sends no email address and iKanban refuses the sign-in.
Next
Prove your domain and connect. For SAML, choose SAML → URL on the Connection card and paste the metadata URL.